Machining Worm Gears with a Tap
A simple method to machine worm gears for astrophotography tracking mounts using a tap as a ready-made hob.

Welcome back! This is the final post of a three-part series on machining worm gear sets for equatorial mounts. In case you missed them, here are my previous blog posts on gear calculations using the Machinery's Handbook and worm machining using a section of threaded steel rod as a starting point.
Background
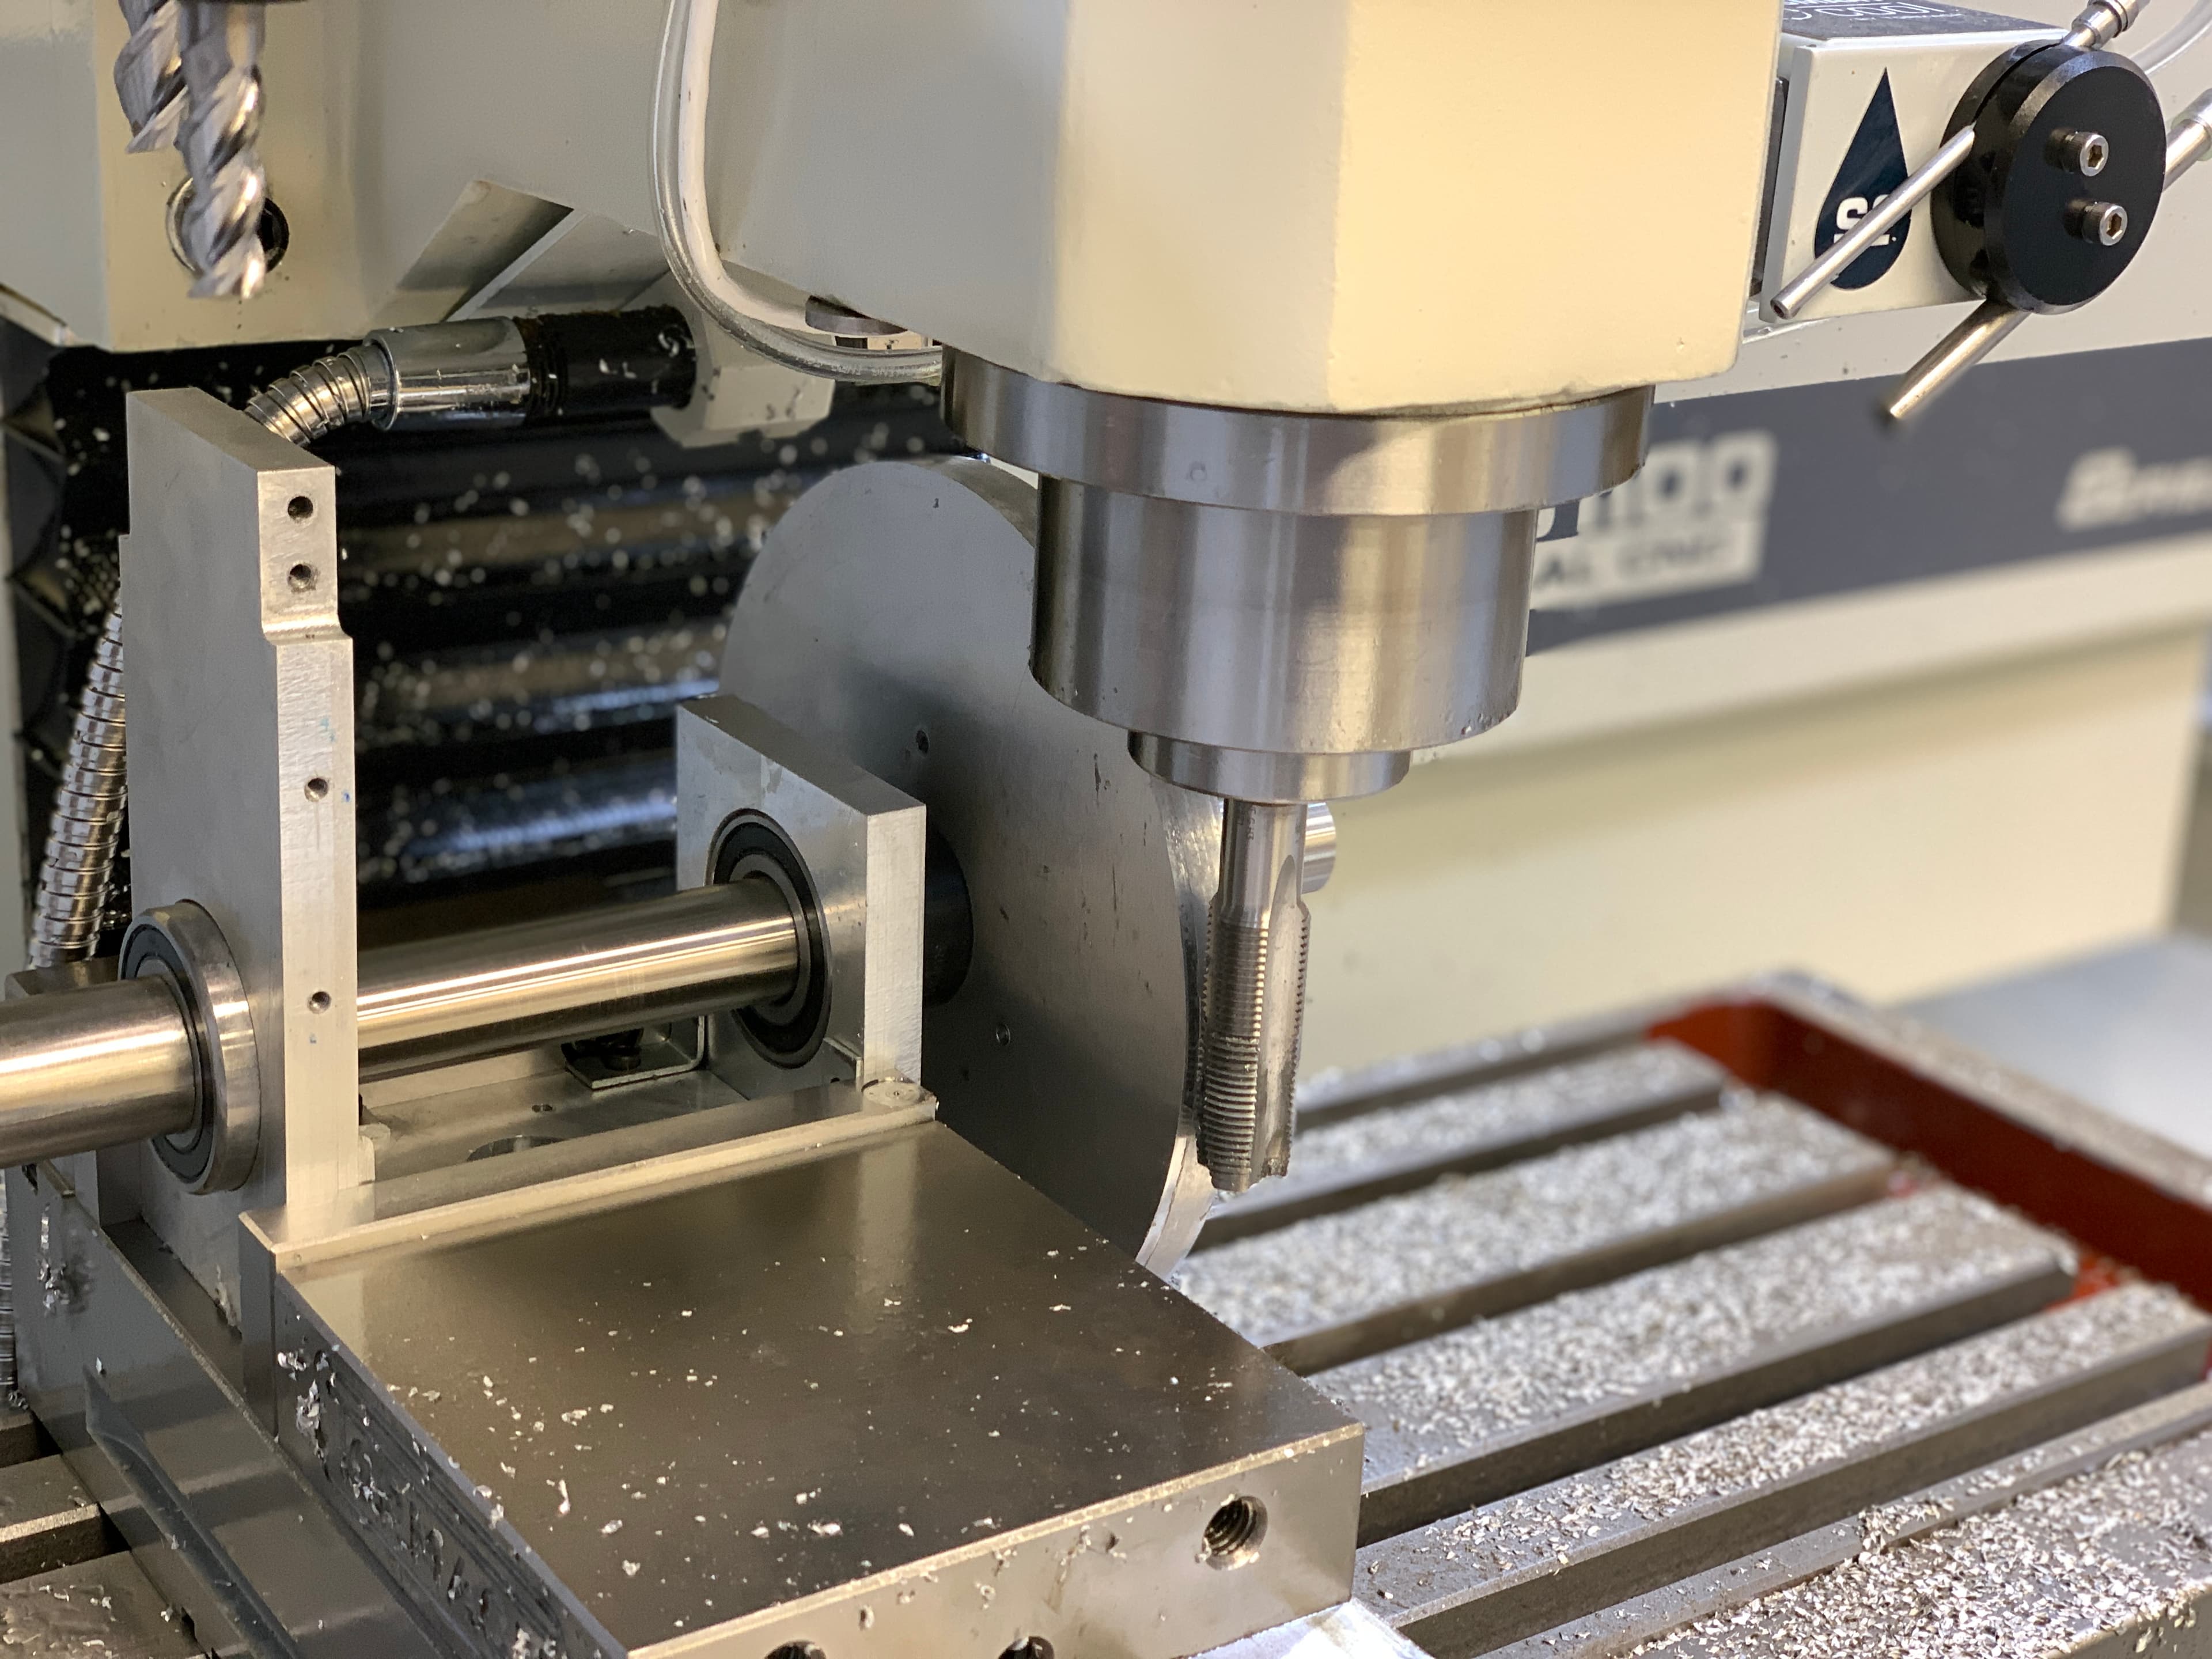
A simple, alternative approach to hobbing accurate worm gears for astrophotography involves using a tap as a ready-made hob and an RA or DEC axis assembly as a ready-made fixture.
This method becomes especially useful if you find yourself in a situation like me where you don't have access to a lathe with auto-feed, preventing you from making your own hob.
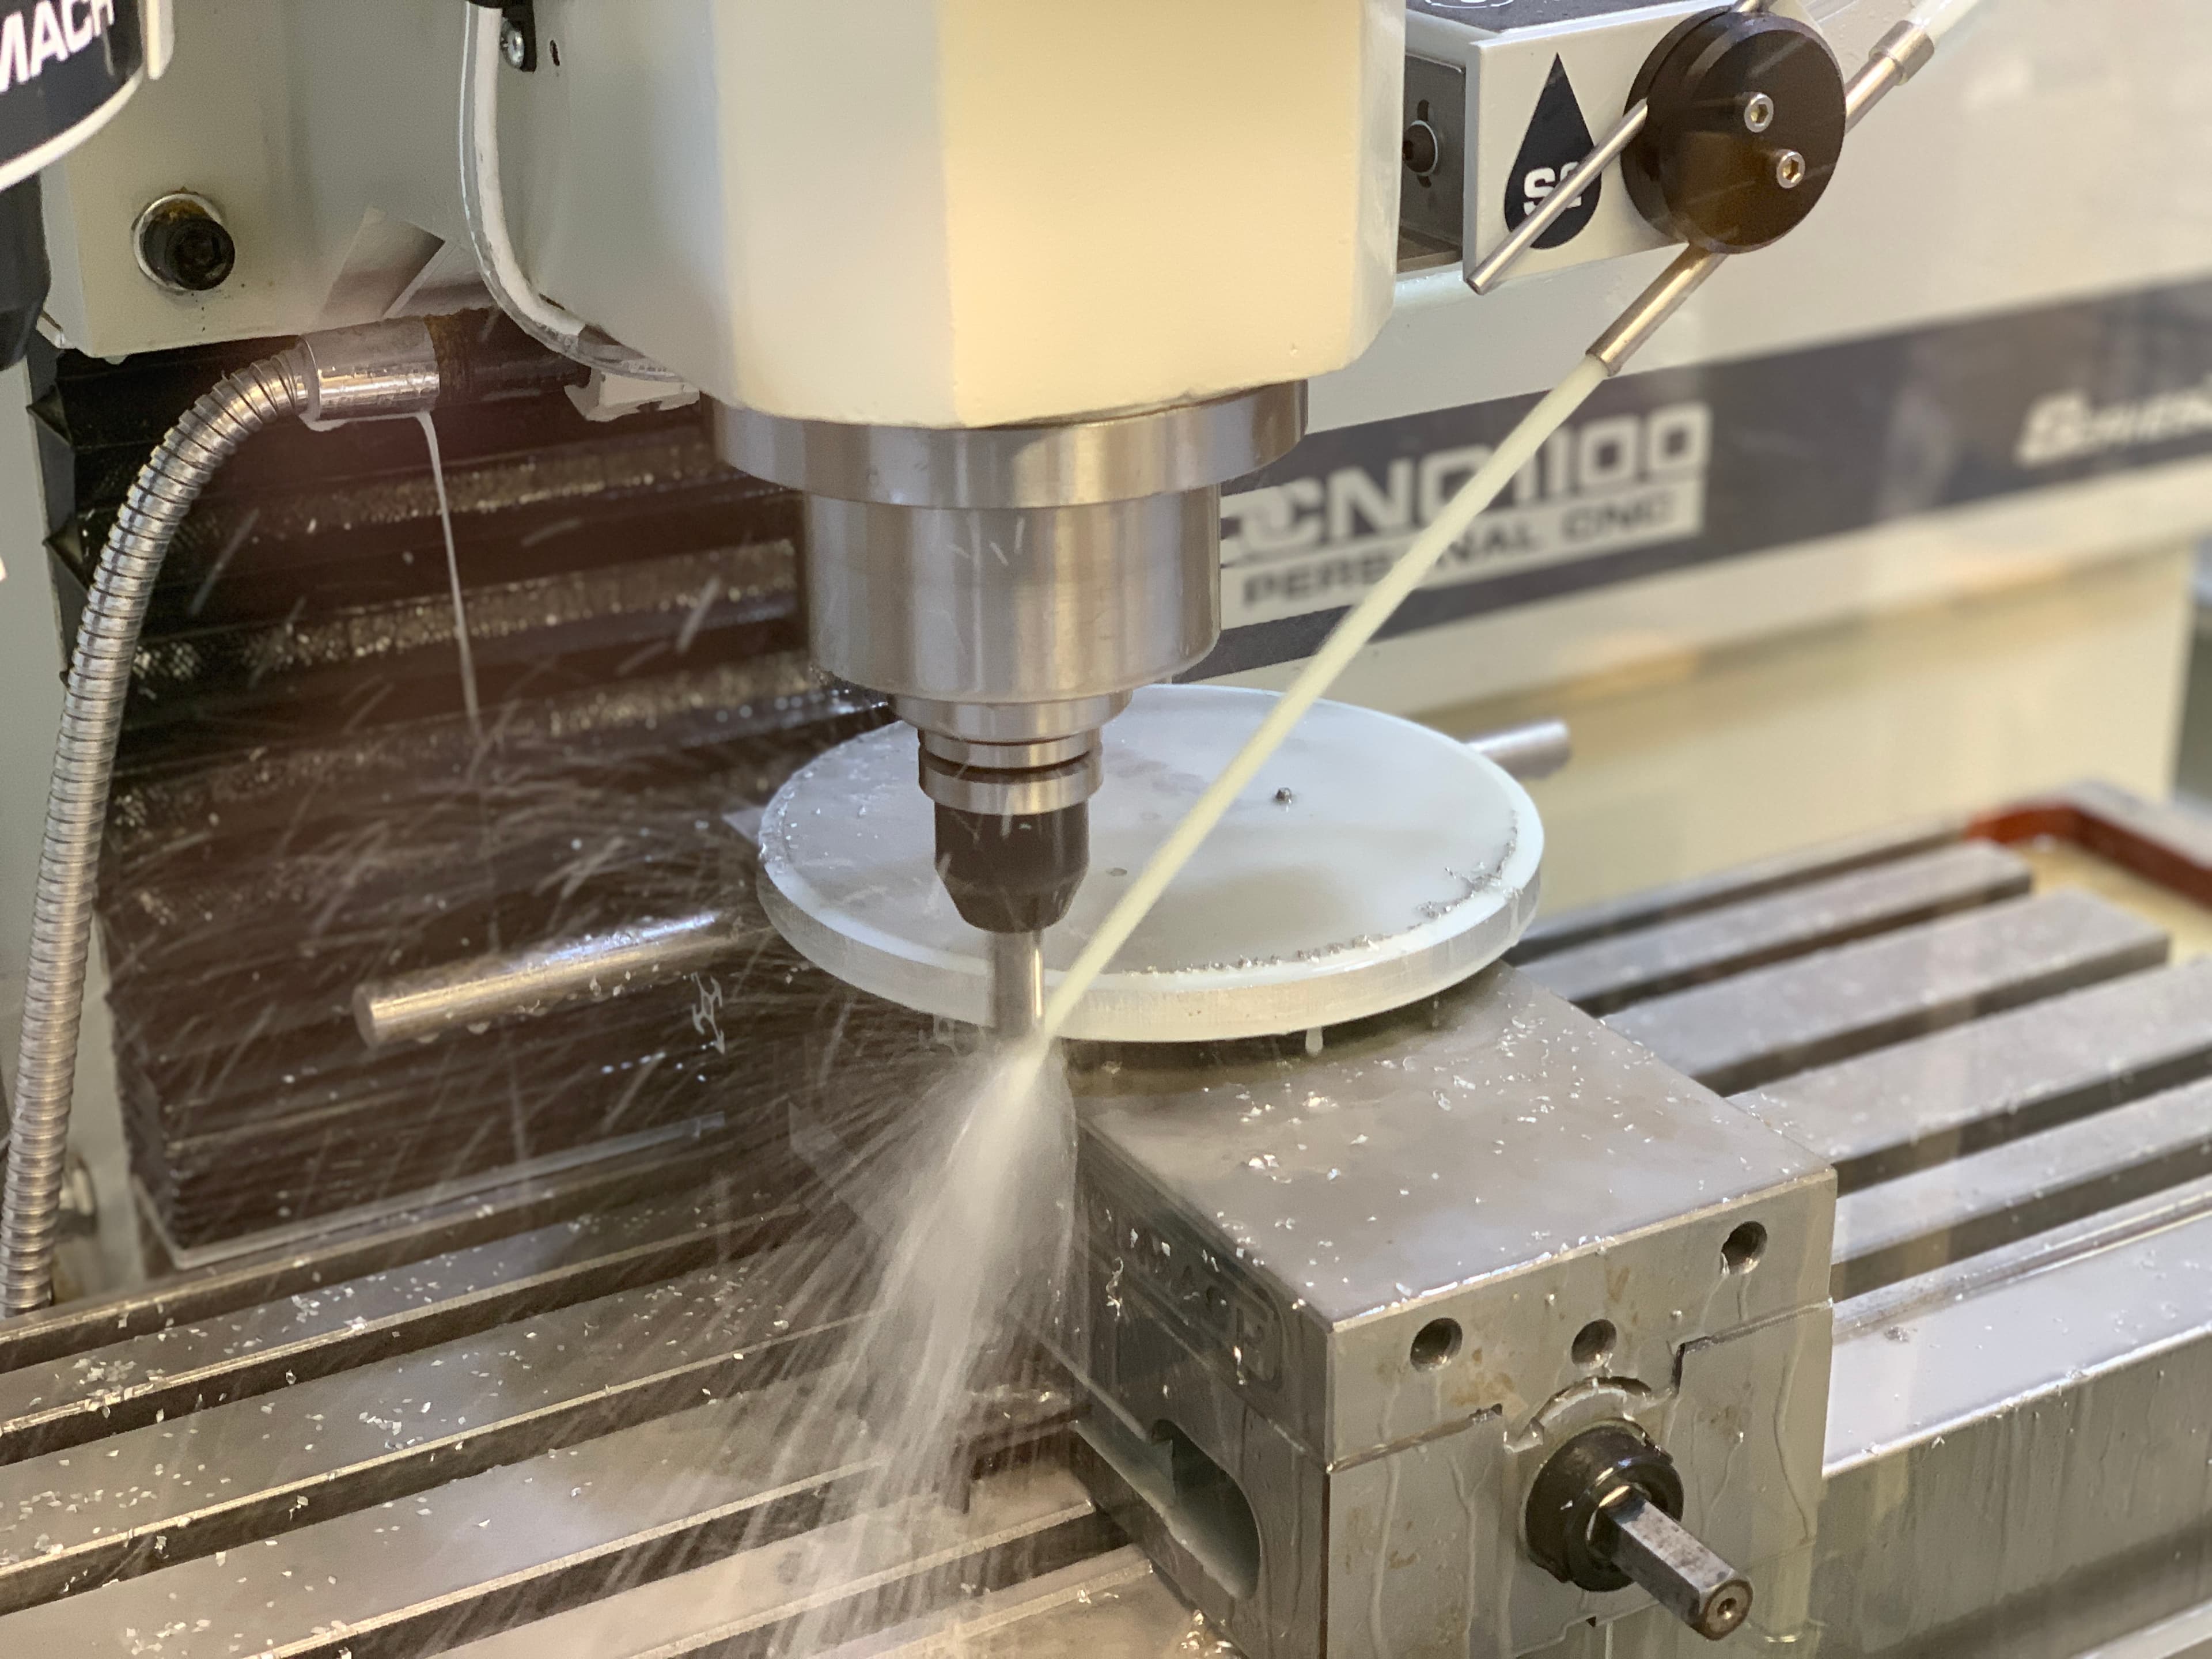
The key is to allow the gear blank to rotate freely around its central axis. When the tap is fitted into the spindle of a mill and pressed against the edge of the worm gear blank, it will automatically rotate the gear blank and gash the correct number of teeth (if you did your math correctly lol).
Fabrication Process
The process I used to machine my equatorial mount's worm gears consisted of three steps:
- Cutting gear blanks from 0.5" aluminum plates
- Hobbing the blanks using a tap and axis assembly
- Polishing by lapping the worm and worm gear together
I'm a little lucky since our shop's brand-new Tormach PCNC mill just got up and running this week, so I chose to do my hobbing using it (but a standard milling machine will also do just fine).
1. Cutting Gear Blanks
First, I cut two gear blanks out of 0.5” aluminum plating. Even a variance of a few thousandths of an inch in worm gear OD is enough to change the number of teeth, so definitely take your time and double-check your measurements/tool-paths. Additionally, any errors in ID will create an axle fit that is either too tight (such that the gear won't even slide onto the axle) or too loose, introducing play that would be detrimental to hobbing, and later, tracking.
To mount the aluminum, I drilled and tapped three holes, attached a shaft collar using them, and finally just clamped the collar in the mill's vice. While machining, I used a 1/2" end mill to cut the blanks out of the aluminum plate.

The metal rod that you can see behind the blank is something I found nearby and put as a spacer, since the mill's vice couldn't close far enough to clamp the collar.
2. Hobbing the Worm Gears
Conveniently, you can use an RA or DEC axis assembly that you might've already made for your eq-mount as a fixture for the hobbing process. The next thing you'll have to do is fit the tap you're using into the spindle of the mill. This was a little finicky for me and I ended up having to wrap the end of the tap with a thin metal sheet to slightly increase its diameter — otherwise, things just wouldn't tighten correctly. But, once I figured that out, the tap was very secure and I was ready to begin hobbing my worm gear blanks.
Make sure to line up the tap so that it's centered along the blank; my blanks were intentionally a little wider than needed so I only needed to eyeball this. Then, touch-off with a sheet of paper (which is approximately 4 thou) and set your zero point accordingly.

To start, I advanced the spindle by 20 thou to take an aggressive cut and really put some pressure against the gear blank to help it turn as the tap spun. Once those initial grooves are made, any further advancements of the tap are much more straightforward. I had written the whole-depth from my earlier gear calculations down on a sticky note, and continued to advance the spindle 1 thou at a time until I reached my desired depth of cut: 45.7 thou.

3. Lapping the Gears Together
I ended up spending a few more days lapping the worms with their corresponding worm gears to ensure a smoother mesh using 30,000 grit lapping compound. If you have time and still have access to a machine shop, then doing this on a lathe or mill would be ideal since you can easily fasten everything else down and keep things steady. Unfortunately (or fortunately?) for me, I just graduated high-school and wasn't going to have regular access to the machine shop and needed to find a solution that would work at home.
My method of choice was to take a hand drill, and tighten the chuck around the 5mm end of the worm where I would normally attach 3:1 reduction gears. Then, I could just hold the trigger down and let the worm spin while my other hand constantly brushed back the lapping compound as it leaked out from the gear teeth. In total, I think I spent around 2 hours per direction, per gear (so a grand total of 8 hours) lapping. Even though it might be a tedious process, definitely polish for longer than you think is necessary (and in both directions) — many of the improvements might not be visible to the human eye, but will likely become evident when taking your final eq-mount for a spin under a starry sky.
Conclusion
Writing after the fact, I can confirm that my equatorial mount is tracking wonderfully. If you're interested, you can find all of the completed astrophotos I've taken with this mount right here. I know this isn't the most ideal way to make worm gears, and some gear machinists might cringe at the thought of using a tap as a hob or a threaded rod as a worm, but I tried to make the most of what I had available to me at school.
In either case, I'm truly satisfied with the results and honestly just so happy to have a working eq-mount in the first place. I was only able to make it as far as I did with this project because of all the kind people who wrote their own guides online — so I hope I can do the same for you. Thank you so much for following along with this series!